How To Charge a Scooter Battery Without a Charger
Electric scooters are getting popular with each passing day. They are a cost-effective and environment-friendly alternative to the previous modes of transport. In addition, electric scooters help you save time by avoiding traffic issues.
The most prominent benefit of electric scooters is that they are rechargeable. Most electric scooters feature a Lithium-Ion battery (commonly known as Li-on Batteries) which can help you ride around 16km in one charge. These batteries are also the ones powering up our smartphones, tablets, and laptops.
The problem is, batteries require charging, and sometimes you may be caught short and need to charge your scooter in the middle of your ride. What happens when you do not have the charger?
Read on to learn about charging your electric scooter without a charger.
Two ways to charge a scooter battery without a charger:
Typically, there are two ways you can charge your scooter battery without a charger:
- Use an adapter – These are available on every electronic gadget store and Amazon. Also, you do not need much knowledge of electronics to use them for your scooter. These devices store a certain amount of electric charge for a certain period. In simple words, it is a power bank for all kinds of batteries.
- Use a portable car jumper – If you have a car, you must have these to jumpstart your batteries. But if you do not have them, don’t worry! They are easily available and are easy to use.
Let us dive deeper into each one of these options.
Use a power adapter.
Using a power adapter to charge your scooter battery may sound like plug-and-play, but it is not that simple! You can damage your battery’s overall health if you don’t take the necessary precautions.
Here is the step-by-step process of charging your scooter battery with a power adapter:
Step 1: Connect the battery with the adapter
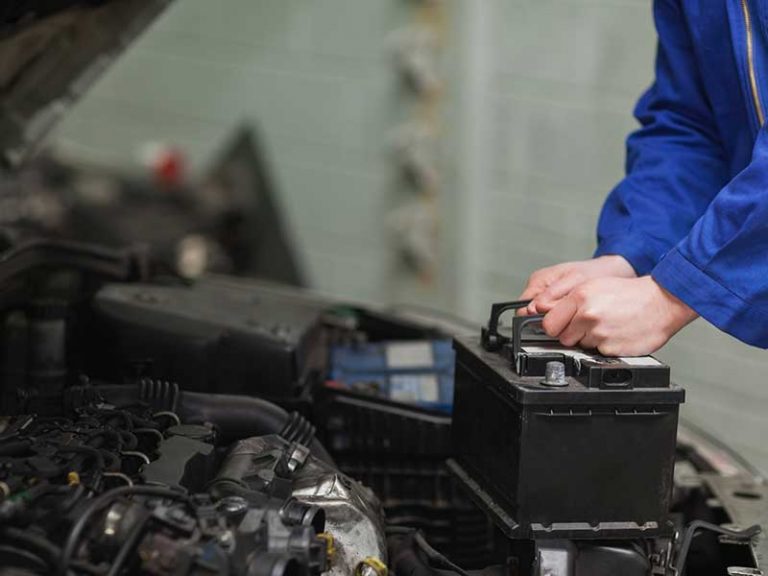
Remember that you should connect the negative port before the positive port. Black wires need to the negative port and red to the positive one. Sometimes, you will also need to get the battery out of your scooter before connecting it with the adapter. It depends on the brand/design of your electric scooter.
Step 2: Set the current and voltage
Once the cables are connected to their respective port, it is time to set the voltage. It is recommended that you read your scooter’s manual for the required voltage. The typical standard is 4.20volts per cell in all batteries. Keep in mind that setting the wrong voltage can damage the battery’s health. So, it is better to be cautious.
After setting the voltage, you need to set the output current from the adapter. To do this, measure the battery capacity (in amp-hours, or Ah). The trick here is to set the output current in the adapter to 20% of your battery’s total capacity. For example, if your battery capacity is 10 Ah, you should set it 2 Ah. In this case, if you set it to lower than 20% of your battery capacity, it will damage your battery. Although, setting it above 20% won’t necessarily cause any damage.
Step 3: Wait until it gets charged
Now you have to wait until your scooter battery gets charged. Most electric scooters will feature a signal/prompt to show that the battery is fully charged. But, if your scooter does not have any such display, you can see if your battery is fully charged by looking at the supplied current. If the supplied current has reached 3% of your battery capacity (again, measured in Ah), your battery is fully charged.
Step 4: Disconnect
Now that your scooter battery is fully charged, disconnect the adapter. You can now place the battery back into the scooter if you had it removed.
Use a portable car jumper.
The second option to charge your electric scooter’s battery without a charger is to use a portable car jumper. It is the easiest and most reliable option available. Here is the step-by-step process:
Step 1: Connect the jumpers.
The first step is to connect the jumpers with the correct port. Unlike the power adapter, you must connect the positive ports with the jumper cables first. Firstly, connect the red cable and then move on with the black one.
Step 2: Turn the jumper on and wait until the battery gets charged.
Once the jumper cables are properly connected with the electrodes, switch the jumper on to start charging. Remember, you cannot modify the current or voltage because these portable jumpers do not have that feature. You have to wait for around 20 minutes to get your battery fully charged.
If you feel that your battery is getting overheated before 20 minutes, you must immediately remove the jumper cables. It may damage your battery’s overall health. Most modern car jumpers have a digital display that shows the current being supplied. But if your jumper does not have that feature, you should monitor your battery temperature with extreme caution.
Step 3: Disconnect the jumpers when charged
When the battery is fully charged, just remove the jumper cables. While removing the cables, keep in mind that you have to remove the negative one before the positive cable.
Other non-conventional ways to charge the scooter without a charger:
In addition to the two options defined above, you have two non-conventional ways to charge your electric scooter without a charger.
1. Replace the battery – You can remove the low battery and replace it with a new battery. It is an easy alternative but can cost you a lot more.
2. Use solar panels – Instead of using the typical power adapters or car jumpers, you can opt for charging your scooter battery with a solar panel. You can purchase a solar panel from online or physical stores. But again, this will cost a lot more than the previous options.
Things to keep in mind while charging your scooter battery:
There are certain factors you need to keep in mind while charging your scooter’s battery. Taking precautions can help you sustain the battery lifespan for a longer period. If you don’t take care of these factors, you can risk damaging your battery’s overall health and ultimately depleting the total lifespan.
- The type of your battery
When you’re charging your scooter’s battery without a charger, you need to consider the battery type to make sure you don’t cause any damage. For example, in the case of a lithium-ion battery, you need to make sure that all cells are connected in a series. Their maximum voltage is equal to the normal full charge voltage of the battery. If that’s not the case, battery health is at risk.
In the case of Lead-Acid batteries, you need to make sure that ‘reverse sulfation’ doesn’t happen. It is when the upper-most layer of the battery has crystals in it. To counter this problem, start the charging with a higher charge than defined above (20% of your total battery capacity). It should solve the problem of reverse sulfation.
And in the case of NiMH/NiCd batteries, keep an eye on the output voltage of the battery to determine if it’s fully charged. If the voltage is below 13.7Volts, the battery’s health is depleted and it won’t last as long as it should.
- Disconnecting the battery
In some cases, you need to remove the battery from your scooter. For example, when you want to charge it with an adapter and cannot find the ports. In that case, you need to have the required equipment with you. To remove the battery and measure the voltage/current, you need to buy some tools. They include voltage meters, amp meters, and typical screwdrivers and plagues.